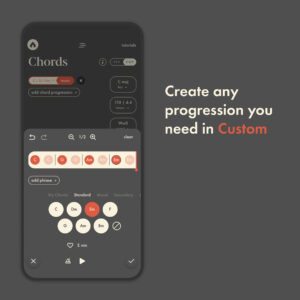
While our pre-built presets make a great jumping-off point or source inspiration, sometimes you just want to make your own progression, right? That’s exactly why Custom is the first option when selecting your chords.
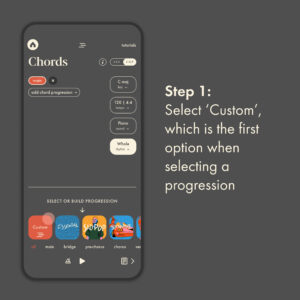
Scroll all the way to the left, and you should find the Custom chord progression option.
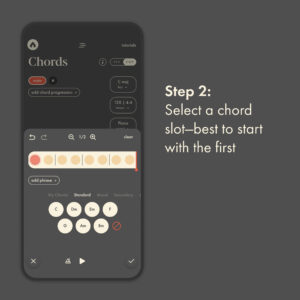
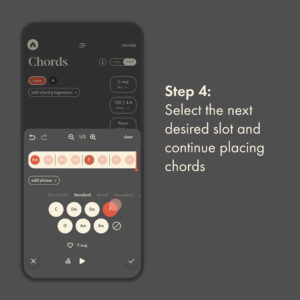
Pick any slot you want, but it will have the first selected by default. Then, you’re ready to start placing chords.
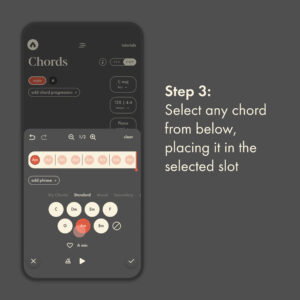
Once you’ve picked a chord, the app will automatically carry on the chord, until you select a new chord for it to play. This is indicated by the ghosted-back chord descriptions in the remaining slots.
Then, keep tapping slots and picking chords. Play back at any time to hear how they all sound together. By default it uses the Whole (note) rhythm, but you could always change that to hear your chords in a different style.
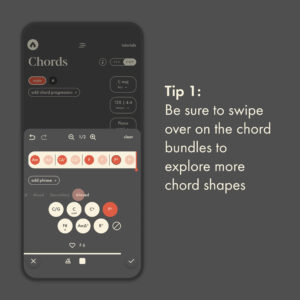
The app presets all the most relevant chords to your selected key. The default view are the standard chords, but swipe and explore some of the other styles of chords for an altogether different feel.

By default, the app shows you two chords per measure (indicated by | breaks), which allows you to change every half note. However, if you’d like to change chords on a quarter note instead, simply tap the zoom icon for more chord slot options.
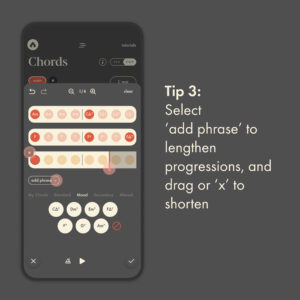
By default, the app shows you 4 full measures. But if you wanted more, simply add a phrase. And if you want less, delete a whole row with the ‘x’ icon. Or remove a partial row by dragging from the end.